今年(2022 年)我在过去几年使用了 MacBook Pro 2015 后购买了新的 MacBook Pro 。 在这里,我想与您分享我使用 的用于 Web 开发的 Mac 设置。
MACBOOK PRO 规格
- 14英寸
- Apple M1 Pro 配备 10 核 CPU、16 核 GPU 和 16 核神经引擎
- 32 GB 内存
- 512 GB 固态硬盘
- QWERTY = 英语(国际)
- macOS 蒙特雷
系统偏好
- Dock
- 从 Dock 中删除用不到的应用程序
- 自动隐藏
- 较小的Dock
- “在 Dock 中显示最近的应用程序”关闭
- “显示打开的应用程序的指示器” 打开
- 电池->“显示百分比”
- 展示
- 夜晚模式
- 安全
- 触控 ID
- 通知
- 关闭,日历除外
- Siri
- 禁用
- 触控板
- 触碰点击
- 指向和单击 -> 查找和数据检测器关闭
- 键盘
- 文本
- 禁用“自动大写单词”
- 禁用“添加带双空格的句号”
- 禁用“使用智能引号和破折号”
- 用
"做双引号 - 用
'做单引号
- 文本
- Spotlight
- 禁用 Spotlight(应用程序和系统偏好设置除外)
- 任务控制
- 角热点:全部禁用
- 发现者
- 侧边栏:
- 激活所有收藏夹
- 将库移至收藏夹
- 隐藏所有标签
- 显示所有文件扩展名
- 30 天后从垃圾箱中删除项目
- 查看 -> 显示预览(例如图像文件)
- 侧边栏:
- 分享
- “更改计算机名称”
- 还有终端:
- sudo scutil –set ComputerName “newname”
- sudo scutil –set LocalHostName “newname”
- sudo scutil –set HostName “newname”
- 还有终端:
- “确保禁用所有文件共享”
- “更改计算机名称”
- 安全和隐私
- 打开文件保险箱
- 将浏览器添加到“屏幕录制”
- 存储
- 删除 Garage Band 和声音库
- 删除 iMovie
- 触控板
- 速度:9/10
- 可访问性
- 滚动速度:6/8
系统偏好设置(终端)
从终端覆盖更多系统首选项…
# 将屏幕截图作为 jpg(通常较小的尺寸)而不是 png
defaults write com.apple.screencapture type jpg
# 在打开新文件时不要打开以前的预览文件(例如 PDF)
defaults write com.apple.Preview ApplePersistenceIgnoreState YES
# 显示库文件夹
chflags nohidden ~/Library
# 显示隐藏文件默认写入
defaults write com.apple.finder AppleShowAllFiles YES
# 显示路径栏默认写入
defaults write com.apple.finder ShowPathbar -bool true
# 显示状态栏默认写入
defaults write com.apple.finder ShowStatusBar -bool true
killall Finder;
文件
- 如果需要以前机器的文件,请通过外部驱动器而不是云传输
Homebrew
安装 Homebrew 作为 macOS 的包管理器:
# 粘贴到终端并按照说明进行操作
/bin/bash -c "$(curl -fsSL https://raw.githubusercontent.com/Homebrew/install/HEAD/install.sh)"
将 Homebrew 中的所有内容更新到最新版本:
brew update
安装 GUI 应用程序(在 GUI 应用程序中阅读有关这些的更多信息):
brew install --cask \
  bitwarden \
  google-chrome  \
  firefox \
  brave-browser \
  tor \
  iterm2 \
  visual-studio-code \
  sublime-text \
  docker \
  rectangle \
  slack \
  discord \
  signal \
  vlc \
  calibre \
  figma \
  maccy
安装终端应用程序(在终端应用程序中了解更多信息):
brew install \
  wget \
  exa \
  git \
  nvm \
  pnpm \
  graphicsmagick \
  commitzen \
  cmatrix \
  vips
图形用户界面GUI应用程序
- Bitwarden
(密码管理器)
- 优先:
- 启用暗模式
- 启用触控 ID
- 优先:
- 谷歌浏览器
(网页开发、网页浏览)
- 优先
- 设置默认浏览器
- 启用暗模式
- 从不保存密码
- 总是显示书签
- 从以前的机器导入书签
- Chrome 开发者工具
- 启用暗模式
- 网络 -> 仅“获取/XHR”
- Chrome 扩展程序
- 优先
- 火狐Firefox (网络开发)
- Brave (网页浏览,钱包)
- Tor (秘密网页浏览)
- iterm2 (终端)
- Visual Studio Code (Web 开发 IDE)
- Sublime Text (编辑)
- Docker
(Docker,见 设置
)
- 用于在容器中运行数据库(例如 PostgreSQL、MongoDB)而不会使 Mac 混乱
- 配置
- 启用“使用 Docker Compose”
- Rectangle
(窗口管理器)
- 使用 Rectangle 设置,而不是 Spectacle
- Slack (团队交流)
- Discord (社区交流)
- Signal (信使)
- VLC
(视频播放器)
- 用作视频文件的默认软件
- Calibre (epub/电子书编辑器)
- Figma (设计)
- Maccy
(剪贴板管理器)
- 启用“登录时启动”
内置 MacOS 应用程序
- iMessage
- 为 iMessage 同步 iCloud 只是为了同步,然后再次禁用 iCloud
- 在 iCloud 上同步联系人
- iPhone:激活消息转发到新 Mac
- Pages
- 显示字数
- Apple Mail
- 设置所有电子邮件帐户
- 在顶部显示最新消息
- Notes
- 新笔记开头:正文
- Quick Time Player
- 保存到桌面
终端应用
- wget (代替curl)
- exa
(代替ls)
exaexa -a(包括隐藏文件)exa -l(包括附加信息)
- git (版本控制)
- nvm (节点版本管理器)
- pnpm (节点包管理器)
- graphicsmagick ( 截图/视觉回归测试 )
- commitzen
- cmatrix (终端屏幕保护程序)
- vips( 支持 M1 上的旧 Gatsby.js 版本 )
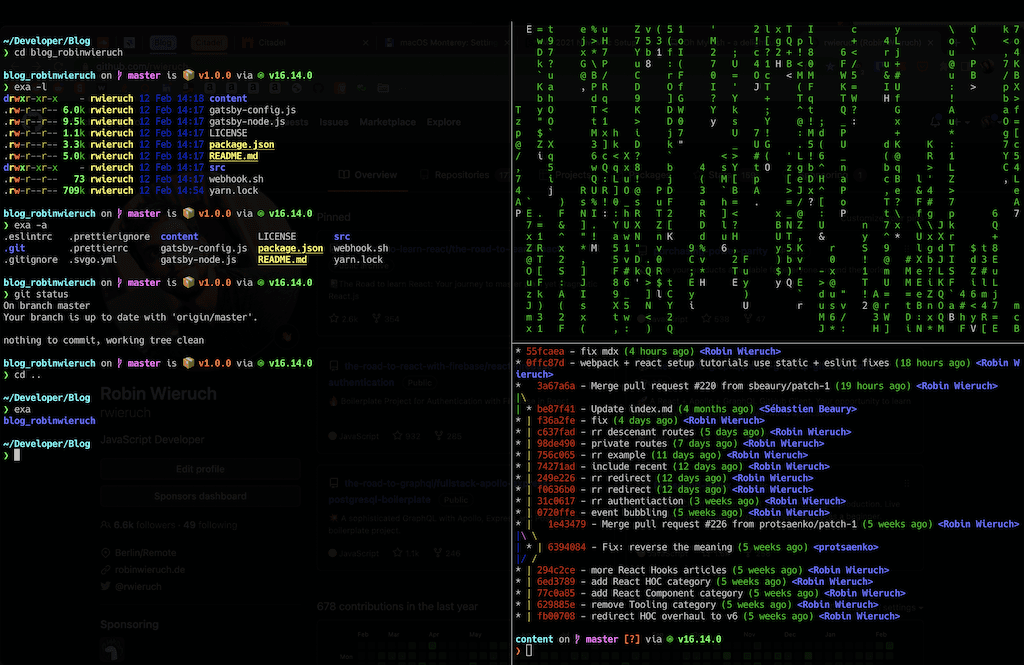
ITERM2
我们希望的终端实现的外观和感觉:
- 将 iterm2 设为默认术语
- 首选项->
- 常规 -> 窗口
- 取消选择“本机全屏窗口”
- 外观->
- 视窗
- 选择“隐藏滚动条”
- 标签
- 取消选择“全屏显示标签栏”
- 调光
- 取消选择所有调光
- 视窗
- 配置文件 -> 窗口
- 透明度:30
- 风格:全屏
- 屏幕:主屏幕
- 配置文件 -> 高级
- 语义历史 -> 用编辑器打开 … -> VS Code
- 使用当前目录打开新的拆分窗格
- 自然文本编辑
- 常规 -> 窗口
- 将其带到全屏 Command + Enters
Oh My Zsh
当你打开 iTerm2 时,你会看到 MacOS 已经自带 zsh 作为默认 shell。安装 Oh My Zsh 以获得改进的(插件、主题等)终端(此处为:iTerm2)体验:
sh -c "$(curl -fsSL https://raw.githubusercontent.com/ohmyzsh/ohmyzsh/master/tools/install.sh)"
将 Oh My Zsh 中的所有内容(例如插件)更新到最新版本:
omz update
重要提示:如果您更改 Zsh 配置 ( .zshrc ) 中的某些内容,请强制重新加载:
source ~/.zshrc
Oh My Zsh 主题 + 字体:
安装 Starship 作为您的新终端主题。我们将使用 Homebrew,但您也可以使用网站上的替代方法:
brew install starship
将其设为终端中 Oh My ZSH 的默认主题:
echo 'eval "$(starship init zsh)"' >> ~/.zshrc
作为字体,我们将在 iTerm2、VS Code 和 Sublime Text 中使用 Hack Nerd Font。通过以下方式安装它:
brew tap homebrew/cask-fonts
brew install --cask font-hack-nerd-font
在 iTerm2 中使用新字体:Preferences -> Profile -> Text -> Font: font-hack-nerd-font。
如果主题和字体更改不适用,请重新加载您的 zsh 配置 ( .zshrc ) 或关闭/打开 iTerm2 。
Oh My Zsh 插件
ZSH 配置文件( .zshrc ):
# Path to your oh-my-zsh installation.
export ZSH="$HOME/.oh-my-zsh"

# Which plugins would you like to load?
# Standard plugins can be found in $ZSH/plugins/
# Custom plugins may be added to $ZSH_CUSTOM/plugins/
# Example format: plugins=(rails git textmate ruby lighthouse)
# Add wisely, as too many plugins slow down shell startup.
plugins=(
  git
  zsh-completions
  zsh-autosuggestions
  zsh-syntax-highlighting
)

# get machine's ip address
alias ip="ipconfig getifaddr en0"

# edit global zsh configuration
alias zshconfig="vim ~/.zshrc"
# reload zsh configuration
alias zshsource="source ~/.zshrc"
# reload zsh configuration
alias ohmyzsh="cd ~/.oh-my-zsh"

# navigate to global ssh directory
alias sshhome="cd ~/.ssh"
# edit global ssh configuration
alias sshconfig="vim ~/.ssh/config"

# edit global git configuration
alias gitconfig="vim ~/.gitconfig"

# git aliases
alias gits="git status"
alias gitd="git diff"
alias gitl="git lg"
alias gita="git add ."
alias gitc="cz commit"

# type sublime . to open current folder in Sublime Text
alias sublime="/Applications/Sublime\ Text.app/Contents/SharedSupport/bin/subl --new-window $@"

# load zsh-completions
autoload -U compinit && compinit

# use nvm
source /opt/homebrew/opt/nvm/nvm.sh

# use starship theme (needs to be at the end)
eval "$(starship init zsh)"
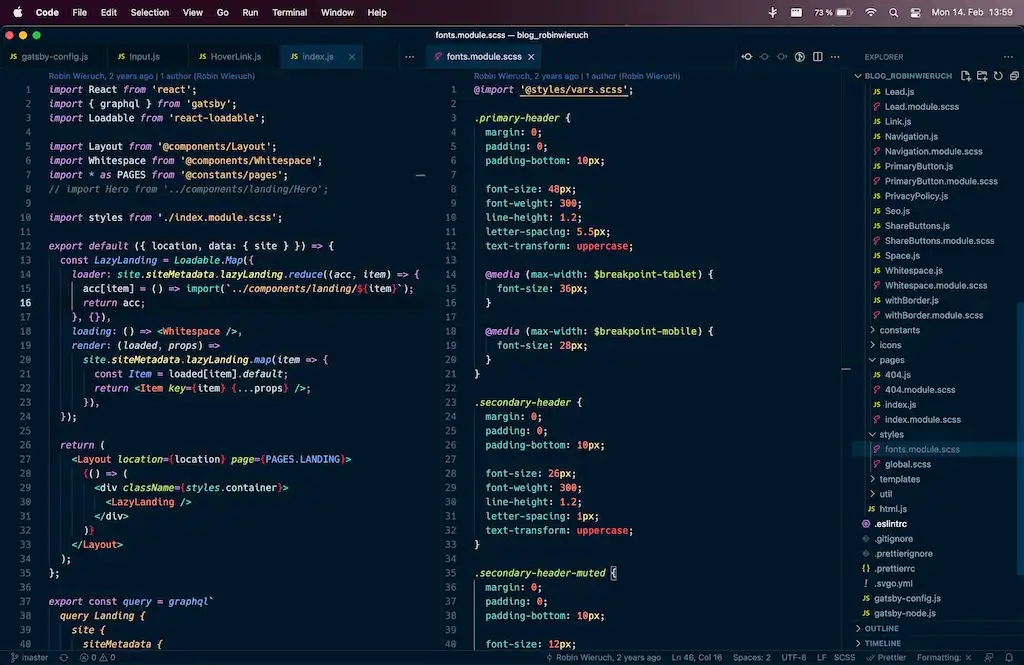
VS 代码
我们希望通过 IDE 实现的外观和感觉:

扩展:
- 夜猫子 (主题)
- 自动隐藏 (隐藏侧边栏)
- EditorConfig (共享配置)
- ESLint ( 代码风格 )
- 更漂亮
( 代码格式
)
- 更漂亮: 格式化切换 (切换更漂亮)
- GitLens (可视化 Git)
- 更好的评论 (评论突出显示)
- 进口成本
- 突出显示匹配标签
- 自动重命名标签
- 自动关闭标签
- 颜色亮点
- ES7+ React/Redux/React-Native 片段
- VSCode 反应重构
- Vscode 风格的组件
- 颜色亮点
- 选色器
手动的:
- 将搜索功能从活动栏移至面板
JSON 设置:
{
  "breadcrumbs.enabled": false,
  "files.trimTrailingWhitespace": true,
  "explorer.confirmDelete": false,
  "workbench.colorTheme": "Night Owl",
  "workbench.sideBar.location": "right",
  "workbench.startupEditor": "none",
  "workbench.statusBar.visible": true,
  "workbench.activityBar.visible": false,
  "workbench.editor.restoreViewState": true,
  "terminal.integrated.fontFamily": "Hack Nerd Font Mono",
  "editor.fontFamily": "Hack Nerd Font Mono",
  "editor.fontSize": 14,
  "editor.tabSize": 2,
  "editor.insertSpaces": true,
  "editor.detectIndentation": false,
  "editor.renderWhitespace": "none",
  "editor.scrollBeyondLastLine": true,
  "editor.minimap.enabled": false,
  "editor.find.seedSearchStringFromSelection": "never",
  // syntax highlighting
  "files.associations": {
    ".env*": "makefile"
  },
  // prettier
  "prettier.singleQuote": true,
  "prettier.printWidth": 70,
  "editor.formatOnSave": false,
  "[javascript]": {
    "editor.formatOnSave": true,
    "editor.defaultFormatter": "esbenp.prettier-vscode"
  },
  "[javascriptreact]": {
    "editor.formatOnSave": true,
    "editor.defaultFormatter": "esbenp.prettier-vscode"
  },
  "[typescript]": {
    "editor.formatOnSave": true,
    "editor.defaultFormatter": "esbenp.prettier-vscode"
  },
  "[typescriptreact]": {
    "editor.formatOnSave": true,
    "editor.defaultFormatter": "esbenp.prettier-vscode"
  },
  // eslint
  "editor.codeActionsOnSave": {
    "source.fixAll.eslint": true
  },
  "eslint.validate": ["javascript"],
  "javascript.updateImportsOnFileMove.enabled": "never",
  "typescript.updateImportsOnFileMove.enabled": "never",
  // auto generated
  "explorer.confirmDragAndDrop": false,
  "js/ts.implicitProjectConfig.checkJs": true
}
SUBLIME
不再用于 Web 开发。主要用于写这篇博客。
一般的:
- 使用许可证
扩展:
- 阿吉拉主题 (主题)
- 黎明前 (主题)
- SideBarEnhancements (文件夹/文件功能)
- TrailingSpaces (删除尾随空格)
JSON 设置:
{
  "caret_style": "solid",
  "folder_exclude_patterns":
  [
    ".git",
    "node_modules"
  ],
  "font_size": 14,
  "font_face": "Hack Nerd Font",
  "gutter": true,
  "highlight_line": true,
  "highlight_modified_tabs": true,
  "ignored_packages":
  [
    "TypeScript",
    "Vintage"
  ],
  "line_padding_bottom": 1,
  "line_padding_top": 1,
  "predawn_findreplace_small": true,
  "predawn_sidebar_arrows": true,
  "predawn_sidebar_narrow": true,
  "predawn_sidebar_xsmall": true,
  "predawn_tabs_small": true,
  "rulers":
  [
    120
  ],
  "scroll_past_end": true,
  "show_line_numbers": true,
  "spell_check": false,
  "tab_size": 2,
  "theme": "Agila Origin.sublime-theme",
  "theme_agila_compact_sidebar": true,
  "theme_agila_compact_tab": true,
  "theme_agila_horizontal_scrollbar_thinnest": true,
  "theme_agila_sidebar_font_xsmall": true,
  "theme_agila_sidebar_mini": true,
  "theme_agila_vertical_scrollbar_thinnest": true,
  "translate_tabs_to_spaces": true,
  "trim_trailing_white_space_on_save": true,
  "color_scheme": "Packages/Agila Theme/Agila Origin Oceanic Next.tmTheme",
}
git
从终端,设置全局名称和电子邮件:
git config --global user.name "Your Name"
git config --global email "you@your-domain.com"
改进 git log:
git config --global alias.lg "log --color --graph --pretty=format:'%Cred%h%Creset -%C(yellow)%d%Creset %s %Cgreen(%cr) %C(bold blue)<%an>%Creset' --abbrev-commit"
然后,就可以使用:
git lg
将默认分支设置为 main 而不是 master:
git config --global init.defaultBranch main
打印全局 git 配置:
git config --list
# or alias
# gitconfig
SSH
SSH 密钥有两种常见的策略:一个 SSH 密钥来统治它们,或者每个服务一个 SSH 密钥。我使用后者,在这里 通过 SSH 连接到 GitHub 来 运行你。
首先,在~/.ssh 文件夹中创建一个新的 SSH 密钥:
# in case the folder is not there yet
mkdir ~/.ssh

cd ~/.ssh
# or alias
# sshhome

ssh-keygen -t ed25519 -C "github"
# follow instructions
# use file name: github
# use passphrase and store it somewhere secure
通过访问私钥确认密码是否正确使用:
ssh-keygen -y -f gitHub
# confirm with passphrase
如果 SSH 配置文件尚不存在,请创建它:
# in case the file is not there yet
touch ~/.ssh/config
在 ~/.ssh/config 文件中,添加新的 SSH 密钥,以便可以自动为每个终端会话获取它:
Host *
  AddKeysToAgent yes
  UseKeychain yes
  IdentityFile ~/.ssh/github
将 SSH 密钥添加到 MacOS 的钥匙串:
ssh-add --apple-use-keychain ~/.ssh/github
通过网站或通过 GitHub CLI(通过 )将公钥添加到您的 GitHub 设置 brew install gh:
# copy public key and add it to https://github.com/
cat ~/.ssh/id_rsa.pub | pbcopy

# or use GitHub's CLI
gh auth login
# for the first login I think the SSH key gets added
# without the next command, but if not:

gh ssh-key add ~/.ssh/id_rsa.pub -t github
就是这样。您已经为一项特定服务在本地创建了 SSH 密钥,通过密码保护它,使其自动可用于每个终端会话,并将其应用到 GitHub。对于 GitHub,您现在可以通过 SSH 与 GitHub 交互。
用于节点/NPM 的 NVM
节点版本管理器 (NVM) 用于安装和管理多个节点版本。在上一步通过 Homebrew 安装后,键入以下命令完成安装:
echo "source $(brew --prefix nvm)/nvm.sh" >> ~/.zshrc

source ~/.zshrc
# or alias
# zshsource
现在在命令行上安装最新的 LTS 版本:
nvm install <latest LTS version from https://nodejs.org/en/>
之后,检查是否安装成功,以及是否一路安装了 节点包管理器(npm) :
node -v && npm -v
将 npm 更新到最新版本:
npm install -g npm@latest
并为 npm 设置默认值:
npm set init.author.name "your name"
npm set init.author.email "you@example.com"
npm set init.author.url "example.com"
如果您是库作者,也请登录 npm:
npm adduser
就是这样。如果要列出所有 Node.js 安装,请键入以下内容:
nvm list
如果要安装更新的 Node.js 版本,请键入:
nvm install <version> --reinstall-packages-from=$(nvm current)
nvm use <version>
nvm alias default <version>
如果您使用它作为 npm 的替代品,可以选择安装 yarn :
npm install -g yarn
yarn -v
如果要列出所有全局安装的软件包,请运行以下命令:
npm list -g --depth=0
就是这样。你有一个运行版本的 Node.js 及其包管理器。
我希望我的设置可以帮助其他开发人员启动并运行他们的 Mac。如果您有任何其他想法或想分享您的设置,请告诉我!